WinMergeは
・コマンドからでも実行
できます!
前提
ここでは例として
・2つのエクセルファイルを
・プラグイン「CompareMSExcelFiles.sct」を使用して比較をし
・結果をhtmlファイルとして出力し
・WinMergeを終了
させるコマンドを紹介します。
準備(プラグインを自動展開にする)
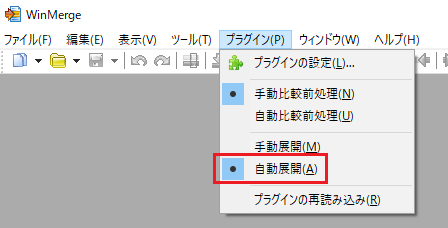
プラグイン「CompareMSExcelFiles.sct」が自動的に展開(適用)されるようにします。
手順
メニューの「プラグイン」をクリックして、「自動展開」にチェック(●)を付ける。

コマンド(Excelファイルを比較する)
コマンド
“C:\Program Files\WinMerge\WinMergeU.exe” エクセルファイルのパス① エクセルファイルのパス① -or 出力するhtmlファイルのパス -noninteractive
以下はコマンドの例です。
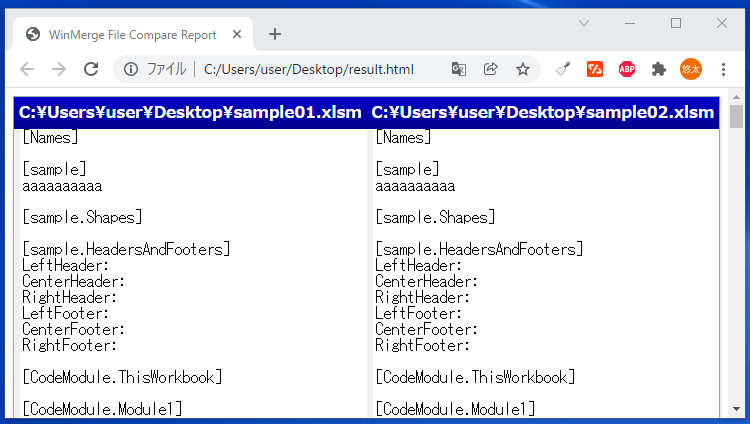
※デスクトップ配下の「sample01.xlsm」と「sample02.xlsm」を比較して、結果を「result.html」へ出力しています。
"C:\Program Files\WinMerge\WinMergeU.exe" C:\Users\user\Desktop\sample01.xlsm C:\Users\user\Desktop\sample02.xlsm -or C:\Users\user\Desktop\result.html -noninteractive実行結果
WinMergeのコマンドを使用して、Excelファイルを比較できました。


参考①
コマンドからではなく、画面(GUI)からでも実施できます。
詳細は以下の記事をご確認ください。
参考②
コマンドで指定できるオプションの詳細は、公式サイトをご確認ください。


